Canned goods are the problem no pantry makeover video talks about honestly. You buy a dozen cans of crushed tomatoes and black beans on sale, stack them wherever there is room, and three months later you are pulling out a can of coconut milk that expired in 2023 to find the chickpeas you need right now. The shelf looks organized for about four days after you clean it. Then the rolling starts again.
I have done this in five different kitchens. The fix is not more shelf space or a labeling system with a fancy font. The fix is a gravity-feed can dispenser rack that enforces first-in, first-out rotation automatically. You load new cans from the back. You pull from the front. Nothing gets buried. The Simple Houseware Stackable Beverage Soda Can Dispenser Organizer Rack is what I have been using for the past year and a half across two shelves and the bottom drawer of my refrigerator. Here is exactly how to set it up.
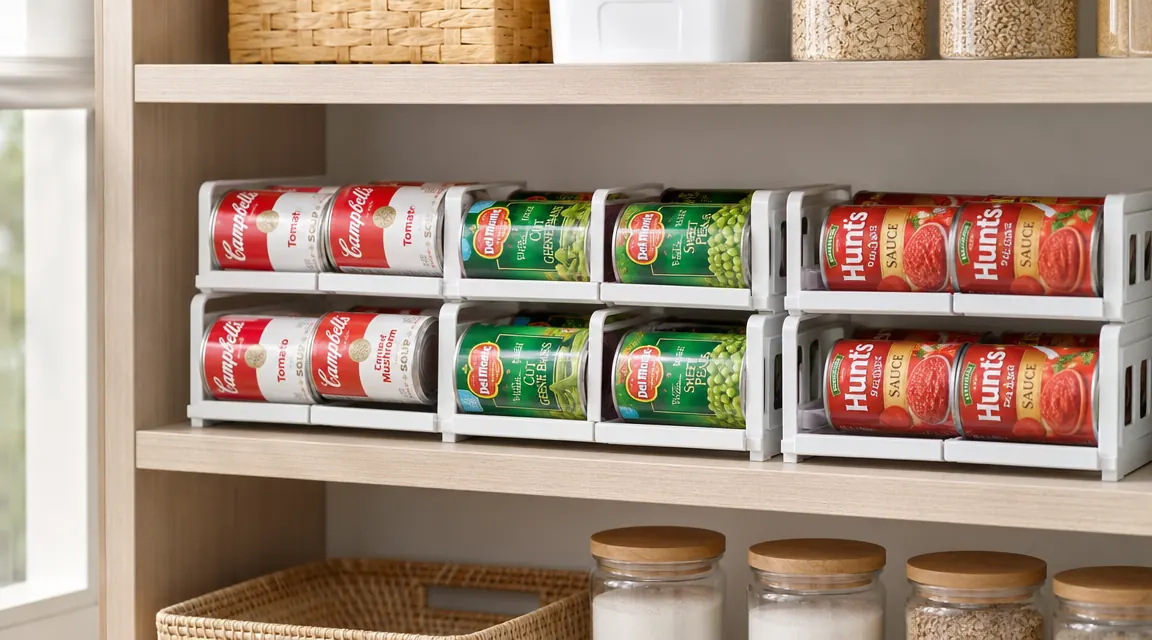
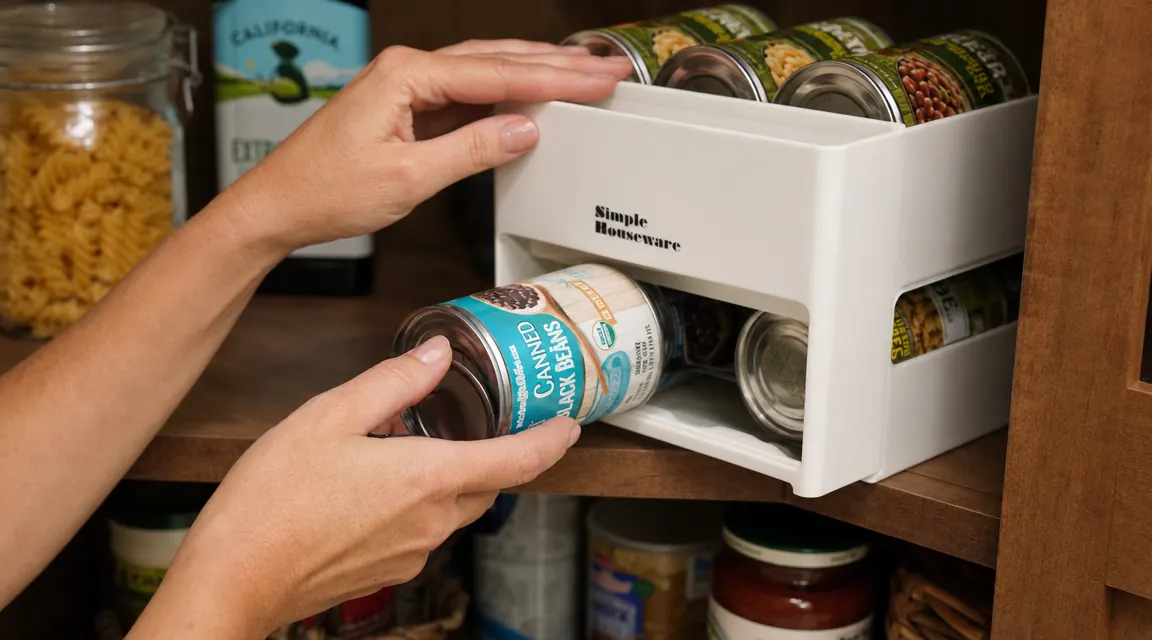
Stop digging through expired cans every time you cook.
The Simple Houseware Stackable Can Dispenser Rack holds up to 36 standard cans per rack, stacks with a second unit for double capacity, and fits most pantry shelves without any modification. Over 32,000 Amazon reviewers rated it 4.6 stars.
Amazon Check Today's Price on Amazon →Step 1: Pull Every Can Off the Shelf and Check Dates
Before you set up any organizer, do a full purge. Pull every single can off the shelf and set them on your counter or kitchen table. This is not optional. If you load a can dispenser without doing this step first, you will just lock the expired and forgotten cans into the back of a rack where they will stay for another two years.
Flip every can over and check the best-by date. Anything past date goes in a bag for the food bank if it is within a reasonable window, or straight in the trash. Anything you do not cook with gets the same treatment. If you have had that can of baby corn for eighteen months and have never opened one, it is not going to happen.
Group the survivors loosely on the counter by type as you sort: soups and broths together, beans together, tomato products together, fish and meat together, fruit and dessert together. Do not spend time organizing them perfectly yet. You are just getting a count. Knowing that you have fourteen soup cans and nine tomato cans tells you how many dispenser racks you need before you buy anything.
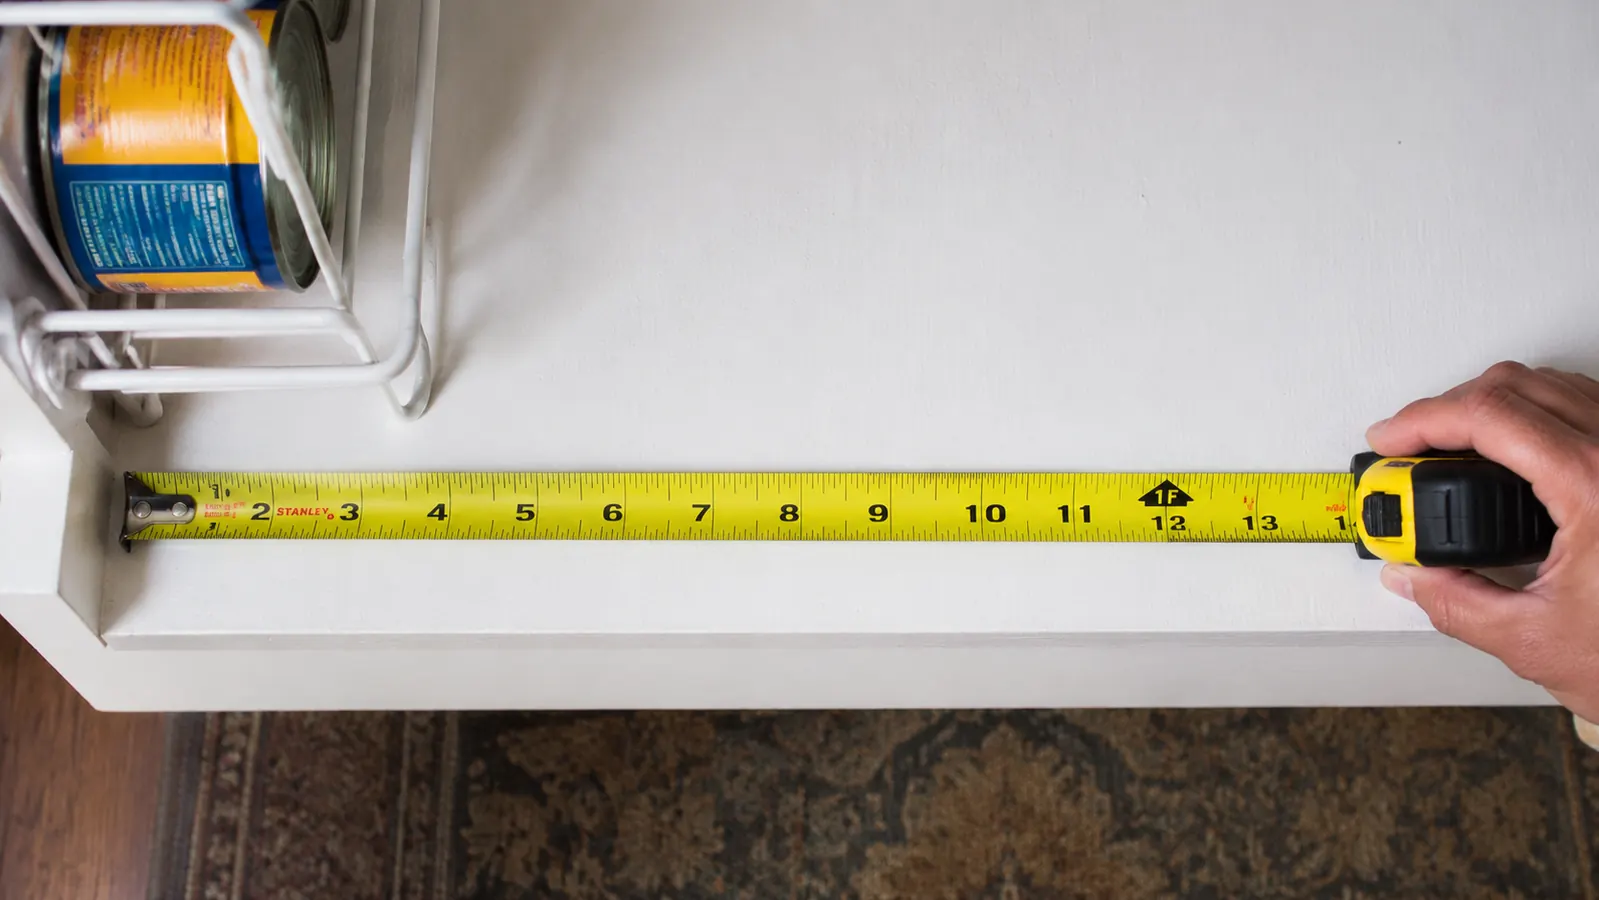
Step 2: Measure Your Shelf Depth, Height, and Width
The Simple Houseware Can Dispenser Rack is 14.5 inches deep. That is the measurement that matters most. If your pantry shelf is a standard 12-inch depth, the rack will hang about 2.5 inches past the front edge. That is actually fine on a fixed shelf with a lip, but it will feel precarious on a wire shelf with no front rail. Measure before you order. If your shelf is 16 inches or deeper, the rack sits flush and you will not think about it again.
Shelf height matters for stacking. Each single rack is about 4.75 inches tall. If you plan to run two units stacked on top of each other, you need at least 10 inches of clearance between shelves, ideally 11 to give yourself room to load cans from the back without scraping the shelf above. Measure the clear height between your shelf surface and the bottom of the shelf above it. Write the number down.
Width is the easiest variable. The rack is 10.25 inches wide, so you can fit multiple units side by side on most standard pantry shelves. A 24-inch wide shelf fits two racks side by side with a couple of inches to spare. A 36-inch wide shelf fits three. If you have narrow cabinet shelves, measure those too. Some upper cabinet shelves are only 11 or 12 inches wide, which is tight but workable for a single rack if you do not stack.
Step 3: Group Your Cans by Type and Decide on Zone Placement
You sorted your cans loosely in Step 1. Now make final grouping decisions based on how often you actually use each category. The cans you reach for multiple times a week go on the most accessible shelf, at roughly counter height or just above. Soups and broths, if you cook with them constantly, go here. Beans, if they go in everything you make, also go here.
Less-used categories go higher or lower. Canned fruit, specialty items like coconut milk or water chestnuts, backup tomato paste you buy in bulk go on a higher shelf where you do not need daily access. The point is to let the rack's gravity-feed do the work for the cans you actually cycle through quickly. Putting slow-moving cans in a dispenser rack is fine, it just means the FIFO rotation happens on a longer timeline.
If you have a refrigerator with a wide bottom drawer or a dedicated beverage shelf, this rack works there too. I keep a single unit in the lower drawer for soda cans and sparkling water. It keeps them from rolling every time I open the drawer and means the oldest cans always come out first. The rack fits a standard fridge shelf with about 2 inches of clearance on both sides in a 24-inch wide refrigerator, but measure your specific shelf before you count on it.
Step 4: Load the Dispenser Using First-In, First-Out Order
This is the step most people skip, and it is the whole reason the dispenser rack exists. FIFO means the oldest cans get used first. Load your existing cans through the top opening at the back. The cans roll down the inclined ramp and line up at the front dispensing opening. The first can you loaded is the first one you grab. When you buy new cans, they go in the back, behind the existing ones. Done.
Before loading, check that the cans you are putting in fit the rack. The Simple Houseware rack is designed for standard 12-ounce beverage cans and standard 14.5-ounce to 15.5-ounce canned goods. Tall 28-ounce crushed tomato cans do not fit. Wide 15-ounce cans of pumpkin puree are borderline, check the diameter. The inside width of each lane is about 2.8 inches. If your can has a diameter under 2.75 inches, it rolls smoothly. If it is wider, it jams.
Stack the second rack on top if your shelf height allows. The two units interlock with plastic tabs so they do not slide around. You do not need tape or anything extra. Load the top rack the same way, back to front. Now you have two rows running FIFO simultaneously. For a family of four that goes through 10 to 12 cans of soup per month, two stacked racks dedicated to soup plus one rack for beans is a reasonable starting setup.
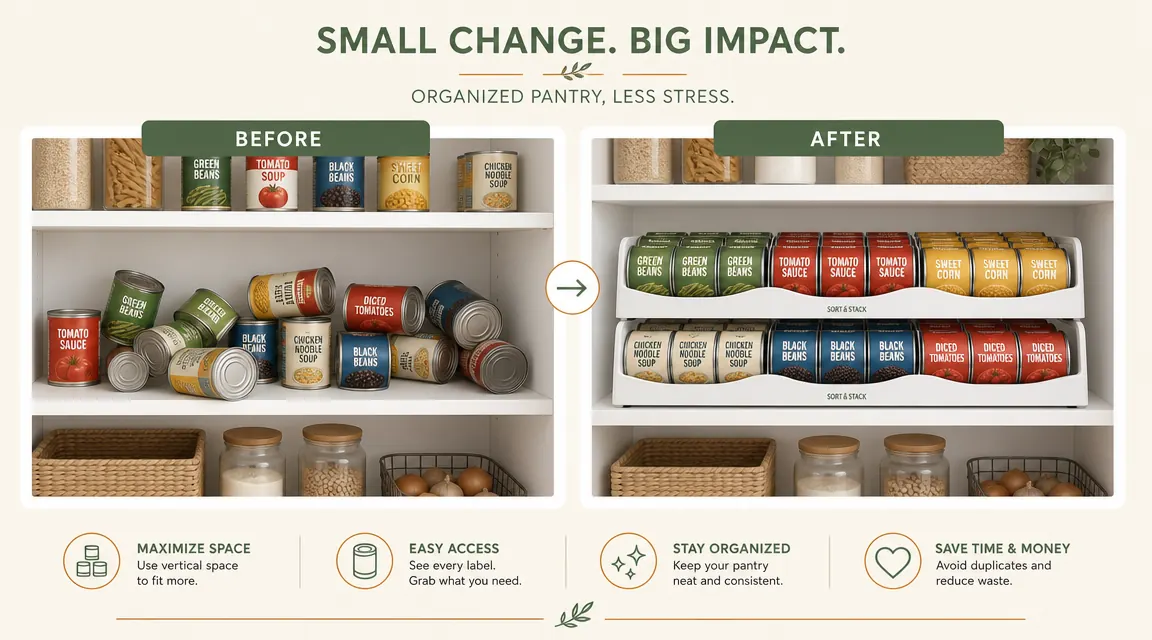
The rack does not just hold cans. It enforces an order that your pantry has never had before. You stop buying duplicates because you can see exactly what you have from the front.
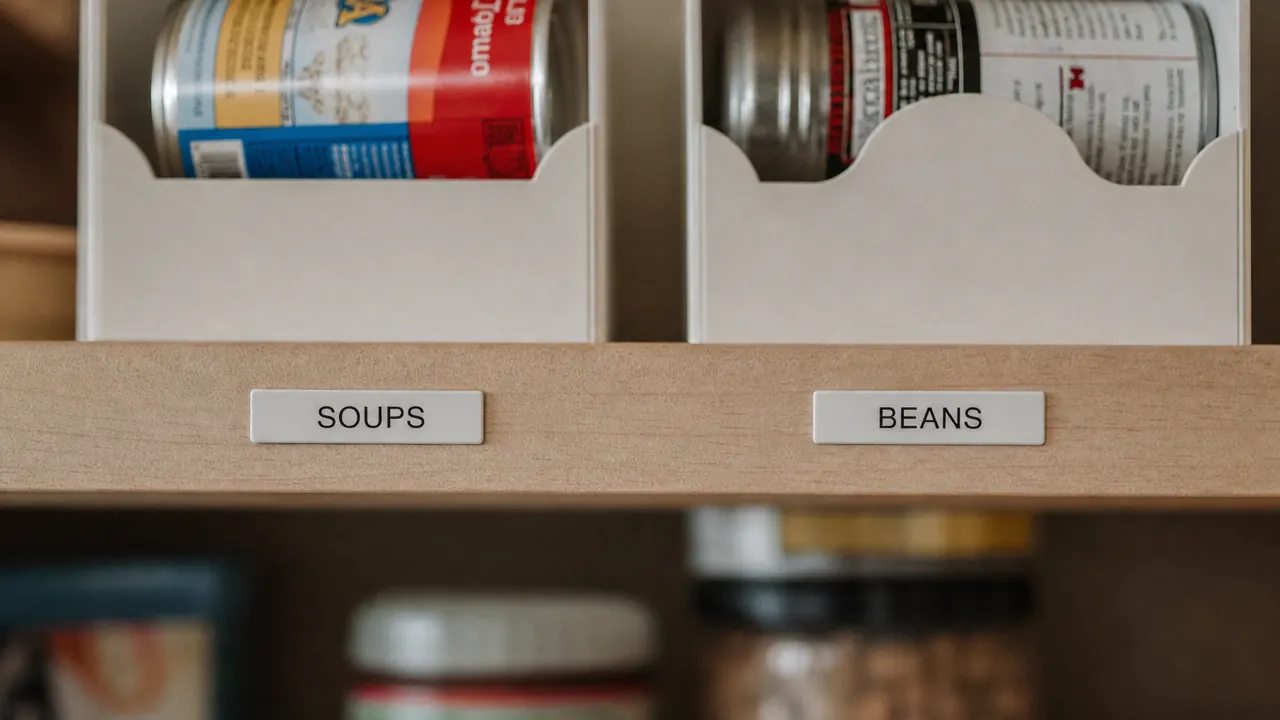
Step 5: Label Shelf Zones and Set a Restock Routine
Once the racks are loaded and placed, label the shelf edge or the front face of each rack with the category it holds. A simple adhesive label maker works fine. SOUPS. BEANS. TOMATOES. FISH. You do not need a color-coded system. You need a two-second visual cue so whoever is putting groceries away knows exactly where things go without having to think about it. In a house with kids or a partner who means well but puts things wherever, this matters more than any other step.
Build a ten-minute restock routine into your grocery day. When you get home, unpack canned goods before anything else. Load new cans into the back of each rack, tallest variety at the back if you have mixed sizes in a lane. The whole process takes about four minutes once the system is set up. What used to be twenty minutes of shuffling things around to find what you need is now a straight reach to the front of the rack.
Every couple of months, pull the racks out and wipe down the shelf underneath. Canned goods leave a dusty ring and the occasional bit of rust from the bottom rim. This takes five minutes and keeps the shelf from building up the grime that makes the whole pantry feel grimy even when it is technically organized. Put it on the same calendar reminder as your fridge clean-out so it actually happens.
What Else Helps
The can dispenser handles the canned-goods problem, but pantry organization does not stop there. For the rest of the shelf space, clear stackable bins are the next most useful tool. They contain loose packets, snack bags, and the miscellaneous items that would otherwise accumulate in a pile at the back of the shelf. When everything you own is in a bin, you can pull the bin out, grab what you need, and slide it back. The shelf stays navigable. If you want to see how I organize the rest of a pantry shelf beyond canned goods, the article on the Simple Houseware Can Dispenser long-term review covers what I learned after six full months of daily use. And if you are wondering whether a can rack is the right call for your specific pantry items, the 10 pantry items that work in a can dispenser rack will tell you exactly what rolls cleanly and what does not.
Your pantry could be this easy to use starting today.
The Simple Houseware Stackable Can Dispenser Rack comes as a 2-pack, stacks securely, and works without drilling or adhesives. Fits standard pantry shelves 14.5 inches or deeper. Check current pricing and availability on Amazon.
Amazon Check Today's Price on Amazon →